• Skip to primary navigation
  • Skip to main content
  • Skip to primary sidebar
  • Skip to footer

Miss Chinese Food

  • Recipes
    • Chinese Eight Cuisines
    • Others Cuisines
    • Homely Recipes
    • Local Snacks
  • Baking
    • Baking Tools
    • Baking Material
    • Cakebread
    • Knowledge For Bake
    • Sweet Snacks
  • Kitchen
    • Buy and Save Ingredients
    • Cooking Skill
    • Food Project
    • Life Tips
    • Originality Of Ingredients
    • Platter Show
  • Blog
  • Tutorials
  • About
    • About Us
    • Contact Us
    • Disclaimer
    • Disclosure
      • Privacy Policy
You are here: Home / Blog / Black Fungus Mixed with Bean Curd Skin

Black Fungus Mixed with Bean Curd Skin

March 24, 2020 by Leo Leave a Comment

Jump to Recipe Print Recipe
Black Fungus Mixed with Bean Curd Skin

Black Fungus Mixed with Bean Curd Skin

Food is not divided into levels, whether it is in the hotel or street food, as long as you like it is food. For those who love food, it is not just a taste enjoyment, but also a kind of spiritual enjoyment. Today I will share with my favorite food—black fungus mixed with bean curd skin.So how to make black fungus mixed with bean curd skin?Let’s take a look today.

How to Make Black Fungus Mixed with Bean Curd Skin

Step 1

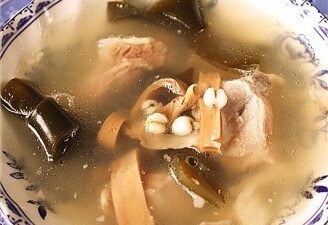
Wash the black fungus and cook in hot water for 5 minutes.

Step 2

Fish out and drain the water.

Fish out and drain the water.

Fish out and drain the water.

Step 3

Prepare bean curd skin, small onions, coriander.

Step 4

Cut the coriander into segments. Cut the onion and bean curd skin into silk.

Cut the coriander into segments.

Cut the coriander into segments.

Step 5

Place the sliced bean curd skin and onions in the black fungus. Then pour 80 ml of salad dressing.

Step 6

Stir well. It’s best to place it for 20 minutes, which will taste better.

Stir well.

Stir well.

Such delicious black fungus mixed with bean curd skin is complete.

Black Fungus Mixed with Bean Curd Skin

Black Fungus Mixed with Bean Curd Skin

Black Fungus Mixed with Bean Curd Skin
Print Recipe

Black Fungus Mixed with Bean Curd Skin

Prep Time5 mins
Cook Time30 mins
Course: Cold Dish
Cuisine: Chinese
Keyword: Black Fungus Mixed with Bean Curd Skin
Servings: 3

Equipment(affiliate link)

  • pan

Ingredients(affiliate link)

  • 200 g tofu skin
  • 250 g

    black fungus

  • 80 ml salad dressing
  • 1 onion
  • 2 coriander

Filed Under: Blog, Homely Recipes, Recipes, Tutorials Tagged With: Cold Dish

You May Also Like

Enjoy while it's hot

Brown Sugar Egg Ginger Soup

Bacon and Potato Braised Rice

Homemade Mulberry Wine

Homemade Mulberry Wine

Previous Post: « The Dried Fish Floss Sushi
Next Post: Auspicious Four Treasures »

Reader Interactions

Leave a Reply Cancel reply

Your email address will not be published. Required fields are marked *

Recipe Rating


Primary Sidebar

Welcome To Miss Chinese Food!

Hi, would you like to learn more great things about Chinese food? Just keep following us and just find your favorite Chinese receipes in our website.

MOST POPULAR

Mango Melaleuca Cake

mango melaleuca cake

Red Beans And Sago

Quick and Easy: Mouthwatering Microwave Chicken Wings in Minutes!

Microwave Chicken Wings

The Sea Cucumber and Chicken Soup

The Super Autumn Pear Paste

The prepared materials are all put into the pot, add the right amount of water, the amount of water can be adjusted, without too much consideration, pear more can add more, pear less words add too much taste will be a lot lighter, fire, fire to boil after turning a small fire slow boil for 30 minutes, remember to cover the pot will be dry

Footer

MissChineseGood.com is a participant in the Amazon Services LLC Associates Program. As an Amazon Associate, we  earn from qualifying purchases. All images & content are copyright protected. Please do not use only images

Copyright © 2025 · Foodie Pro on Miss Chinese Food

Don't Miss Chinese Food Update

Be the first to get exclusive recipes straight to your email.

Invalid email address
We promise not to spam you. You can unsubscribe at any time.
Thanks for subscribing! Please check your email for further instructions.